Wednesday, December 26, 2012
Holiday Gift Bags
In my last post I talked about the crafts that my art class made. Those crafts were given to people in a local convalescent home who could not spend the holidays with their family. After the crafts were dry, I put them in brown paper bags that I decorated. Each bag contained a Christmas tree ornament, a gingerbread man ornament, a holiday wreath ornament, and a holiday flip-book (see last post for instructions on how to make the crafts). The gingerbread men ornaments were an old project I had from Oriental Trading Company. I used stickers to decorate the bags and foam snowflakes and gingerbread men as gift tags ($1 for ten snowflakes or gingerbread men at Target). I taped the bags shut and punched a hole into both the bag and the tag then tied the two together using yarn. I am so proud of the kids. They did a great job and the convalescent home is extremely appreciative of the gift packages. Hope everyone has a happy and safe holidays!
Monday, December 24, 2012
Easy Holiday Crafts
Looking for some easy, simple, last minute holiday crafts that the kids can make that can be given as gifts? Well, you've come to the right place! My art class recently made holiday craft packages for people in a local convalescent home. Inside was a gingerbread man ornament, a Christmas tree ornament, a holiday wreath ornament, and a holiday flip-book. I will be posting more about the gift packages later, but for now here are three crafts you're kids will love making and giving!
Holiday Wreath Ornaments
Materials:
- small paper plates (one per ornament)
- green and red crepe paper (found at dollar stores or party stores- can use tissue paper)
- pipe cleaners (red and green)
- scissors
- glue (bottled)
- Cut out the middle of the paper plate so that the rim is intact. (I have a set of scrap booking cutters with circle templates that I used to get a nice clean edge- it also allows me to save the centers for future projects.)
- Cut small squares from the crepe paper- they don't have to be the same size or perfect squares.
- Glue the squares of crepe paper to the paper plate. Kids can do this in any way they want- let them have fun with it and be creative. See examples of what my art kids did below.
- Make a bow out of a red pipe cleaner and attach it to the rim using another pipe cleaner. (see photos for instructions)
From the book, Look What You Can Make With Paper Plates
Materials:
- large paper plates (approximately one per ornament)
- crayons and markers
- scissors
- glue (bottled)
- yarn (any color)
- optional: beads, sequins, pipe cleaners, stickers, etc.
Directions:
- Cut the rim off of the paper plate; you can save the middle of the plate for future crafts.
- Cut the rim into sections starting with bigger pieces and working your way to the smallest piece- the top of your tree. It is best to angle your cuts so that when layered it looks like a tree.
- Arrange your pieces so that the largest is at the bottom and glue them together.
- Color and decorate your tree.
- Tape a piece of yarn to the back to hang the tree.
Holiday Flip-Books
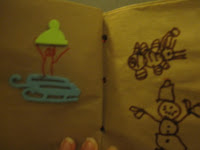
This is a craft I found at Parents.com. It is made out of lunch bags and is super easy and came out really cute. Instead of using photos of the kids and other items the site suggests, I had the kids make it a generic holiday themed book because we did not know exactly who each gift would be delivered to. Use scraps of wrapping paper, pom poms, beads, pipe cleaners, and stickers. The kids loved using the holiday foam stickers I provided and fiber fill that when pulled apart looks like snow. Click the link to find out how to make the craft and see below for photos of what the kids in my art class created.
Subscribe to:
Comments (Atom)


